This is a quick, step by step guide to creating a simple app for Android using Unity. This tutorial is for windows but other then the install instructions it should work for other platforms. By the end of this tutorial you will have created an app that displays a red spinning cube on a blue background running on your Android device.
Setup the Android SDK
To create an Android app you need to install the Android SDK, which can be downloaded from here. I installed the SDK to c:\android-sdk
If you don’t have a Java Developer Kit (JDK) you will need to download one from here before you can install the Android SDK.
Once the SDK is installed, you need to add the Android 5.01 (API level 21) package to it. Run the SDK Manager and use it to download the API level 21 packages (it should all be selected by default). See here for more info.
Setup your device for testing
Next, you will need to install the USB device drivers for your Android device. Whilst it is possible to use the Android Emulator, its performance is pretty bad so you are much better off testing on a real device. If you are using a “Nexus” device you can install its USB drivers using the SDK Manager, otherwise you will need to install your device’s specific drivers. See here for more info on setting up your USB driver.
You will need to enable USB debugging for your device. On Android 4.2 and higher, the Developer options screen is hidden by default. To make it visible, go to Settings -> About phone and tap Build number seven times. Return to the previous screen and select Developer options at the bottom and turn on USB debugging. On older versions of Android, go to Settings -> Applications -> Development and turn on USB debugging.
To test that everything is set up, plugin in your device, open a cmd prompt and run the following commands :
cd \android-sdk\platform-tools
adb devices</pre>
Your plugged in device should be listed. If not check your device as it may be prompting you to authorize your PC.
Setup Unity
Download and install Unity 3D to its default location. The installer can be downloaded from here. Run Unity after the install is complete. You will need to create/login into a Unity account when you first run Unity.
Also, if you have never installed Unity before on your PC you will also be given the option to run Unity Pro for an evaluation period or to run the Free edition. This tutorial only requires the Free version of Unity and I suggest you start with the Free version. You can always upgrade at a later date. You can compare the different versions of Unity here.
Creating the app
Start Unity and select Create New Project in the Project Wizard, name the project RedCube and click Create (if you already have a project open, select File -> New Project to create a new project).
Change the screen layout
In the drop-down box in the upper right of the screen make sure 4 Split is selected.
Create the cube
From the GameObject menu select 3D Object and then select Cube. Make sure that Cube is selected in the Hierarchy panel (3rd panel along the top of the screen), then in the Inspector panel (far right panel) set the following values for the cube:
- Position: x = 0, y = 0, z = 0
- Rotation: x = 0, y = 45, z = 45
- Scale: x = 2, y = 2, z = 2
Position the camera
Select the Main Camera in the Hierarchy panel and set the following properties for the camera in the Inspector panel:
- Position: x = 0, y = 0, z = -5
Add a light
From the GameObject menu, select Light and then Point light. Set the following properties for the light:
- Position: x = 0, y = 0, z = -5
Test the scene
Click on the Play button (top center of the screen). You should now see the lower left panel switch to the Game tab and you should see a white cube on a blue background.
Press the Play button again to stop the game.
Note, this important: Unity allows you to make changes whilst the game is running but these changes are lost as soon as you stop the game running. This is great for debugging but is an easy way to lose you changes :)
Save your project
Speaking of losing your work, now is a good time to save your project. Select File -> Save Scene, enter RedCubeScene as the name for the scene when prompted. Then select File -> Save Project to save the project. Remember to save your work regularly.
Making the cube red
Right click on the Assets folder in the Project panel (3rd along the bottom) and then select Create -> Material, name it RedMat. In the Inspector window click on the white color block next to Main Color and then select a red color from the color picker.
Drag the RedMat material from the Project window onto Cube in the Hierarchy window. The cube should now turn red in the various scene panels. If you are only seeing a wireframe outline of your cube in the Scene panels, select Textured from the Scene panel drop down menu that says Wireframe.
Making the cube spin
In Unity, scripts are used to add behaviors to objects and to create the logic of your game. We will use a script to make the cube spin.
Right click on the Assets folder in the Project panel and select Create -> C# Script, name it Spin.
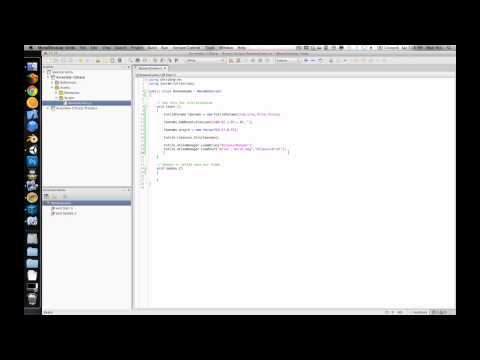
In the Inspector window click the Open button, give it a moment for the MonoDevelop IDE to launch. You should see a code editor window. Modify the code to read as follows:
using UnityEngine;
using System.Collections;

public class Spin : MonoBehaviour {
    // Use this for initialization
    void Start () {
    }

    // Update is called once per frame
    void Update () {
        // rotate at 90 degrees per second
        transform.Rotate(Vector3.up * Time.deltaTime*90);
    }
}
Save the code (press Ctrl+S) and then switch back to the Unity editor.
Drag the Spin script from the Project window onto Cube in the Hierarchy window. Click on Cube in the Hierarchy panel. In the Inspector panel you should see that the cube now has the Spin script (and the RedMat) assigned to it.
Press the Play button. You should now see a red cube spinning in the Game window. Press Play again to stop the game.
Building the app
Now that we have the app completed, we need to build it for Android.
Select Edit -> Project Settings -> Player
In the Inspector window under Cursor Hotspot click on the tab with the Android icon (4th tab along).
In the Other Settings section change the following values:
- Bundle Identifier = com.rabidgremlin.tut.redcube
Now, select Edit -> Preferences and then select the External Tools section. Click on the Browse button next to Android SDK location and select the root folder of your Android SDK install (c:\android-sdk in my case).
Next plug-in your device.
Now, select File -> Build & Run, this will open the Build Settings window. Select Android under platform and then click on the Build & Run button, when prompted for a name for the .apk file enter in RedCube.
A build dialog will pop up and you will see the app being built followed by a message about the app getting pushed to your device.
Have a look at your device, you should see the RedCube app starting up, followed by a red cube spinning on a blue background.
Congratulations you have created your first Unity Android app !
What next?
If you are interested in creating 2D games with Unity then check out my Run Bunny, Run! tutorial series.
Otherwise go and complete the some of the Unity tutorials. These will give you a good understanding of how Unity works. Also check out the very comprehensive documentation and the very helpful community.
Have fun :)
 Next up is some “boring” housekeeping work on the code. Eventually the game will consist of four screens. If I keep up with my current approach of putting everything in a single script things will get pretty messy, pretty fast.