Here are the next two videos in the series:
The rest of the videos can be found here
A little soapbox for me to stand on and rant from.
Here are the next two videos in the series:
The rest of the videos can be found here
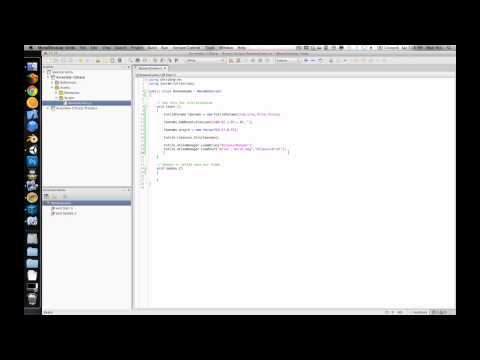
After much delay I’ve finally started recording a series of videos on creating a 2D game using Unity. Here are the first two videos. If you want to play the game then check out the Run Bunny, Run! website
Watch all the videos in the series here
This is a quick, step by step guide to creating a simple app for Android using Unity. This tutorial is for windows but other then the install instructions it should work for other platforms. By the end of this tutorial you will have created an app that displays a red spinning cube on a blue background running on your Android device.
To create an Android app you need to install the Android SDK, which can be downloaded from here. I installed the SDK to c:\android-sdk
If you don’t have a Java Developer Kit (JDK) you will need to download one from here before you can install the Android SDK.
Once the SDK is installed, you need to add the Android 5.01 (API level 21) package to it. Run the SDK Manager and use it to download the API level 21 packages (it should all be selected by default). See here for more info.
Next, you will need to install the USB device drivers for your Android device. Whilst it is possible to use the Android Emulator, its performance is pretty bad so you are much better off testing on a real device. If you are using a “Nexus” device you can install its USB drivers using the SDK Manager, otherwise you will need to install your device’s specific drivers. See here for more info on setting up your USB driver.
You will need to enable USB debugging for your device. On Android 4.2 and higher, the Developer options screen is hidden by default. To make it visible, go to Settings -> About phone and tap Build number seven times. Return to the previous screen and select Developer options at the bottom and turn on USB debugging. On older versions of Android, go to Settings -> Applications -> Development and turn on USB debugging.
To test that everything is set up, plugin in your device, open a cmd prompt and run the following commands :
cd \android-sdk\platform-tools
adb devices</pre>
Your plugged in device should be listed. If not check your device as it may be prompting you to authorize your PC.
Download and install Unity 3D to its default location. The installer can be downloaded from here. Run Unity after the install is complete. You will need to create/login into a Unity account when you first run Unity.
Also, if you have never installed Unity before on your PC you will also be given the option to run Unity Pro for an evaluation period or to run the Free edition. This tutorial only requires the Free version of Unity and I suggest you start with the Free version. You can always upgrade at a later date. You can compare the different versions of Unity here.
Start Unity and select Create New Project in the Project Wizard, name the project RedCube and click Create (if you already have a project open, select File -> New Project to create a new project).
In the drop-down box in the upper right of the screen make sure 4 Split is selected.
From the GameObject menu select 3D Object and then select Cube. Make sure that Cube is selected in the Hierarchy panel (3rd panel along the top of the screen), then in the Inspector panel (far right panel) set the following values for the cube:
Select the Main Camera in the Hierarchy panel and set the following properties for the camera in the Inspector panel:
From the GameObject menu, select Light and then Point light. Set the following properties for the light:
Click on the Play button (top center of the screen). You should now see the lower left panel switch to the Game tab and you should see a white cube on a blue background.
Press the Play button again to stop the game.
Note, this important: Unity allows you to make changes whilst the game is running but these changes are lost as soon as you stop the game running. This is great for debugging but is an easy way to lose you changes :)
Speaking of losing your work, now is a good time to save your project. Select File -> Save Scene, enter RedCubeScene as the name for the scene when prompted. Then select File -> Save Project to save the project. Remember to save your work regularly.
Right click on the Assets folder in the Project panel (3rd along the bottom) and then select Create -> Material, name it RedMat. In the Inspector window click on the white color block next to Main Color and then select a red color from the color picker.
Drag the RedMat material from the Project window onto Cube in the Hierarchy window. The cube should now turn red in the various scene panels. If you are only seeing a wireframe outline of your cube in the Scene panels, select Textured from the Scene panel drop down menu that says Wireframe.
In Unity, scripts are used to add behaviors to objects and to create the logic of your game. We will use a script to make the cube spin.
Right click on the Assets folder in the Project panel and select Create -> C# Script, name it Spin.
In the Inspector window click the Open button, give it a moment for the MonoDevelop IDE to launch. You should see a code editor window. Modify the code to read as follows:
using UnityEngine;
using System.Collections;

public class Spin : MonoBehaviour {
    // Use this for initialization
    void Start () {
    }

    // Update is called once per frame
    void Update () {
        // rotate at 90 degrees per second
        transform.Rotate(Vector3.up * Time.deltaTime*90);
    }
}
Save the code (press Ctrl+S) and then switch back to the Unity editor.
Drag the Spin script from the Project window onto Cube in the Hierarchy window. Click on Cube in the Hierarchy panel. In the Inspector panel you should see that the cube now has the Spin script (and the RedMat) assigned to it.
Press the Play button. You should now see a red cube spinning in the Game window. Press Play again to stop the game.
Now that we have the app completed, we need to build it for Android.
Select Edit -> Project Settings -> Player
In the Inspector window under Cursor Hotspot click on the tab with the Android icon (4th tab along).
In the Other Settings section change the following values:
Now, select Edit -> Preferences and then select the External Tools section. Click on the Browse button next to Android SDK location and select the root folder of your Android SDK install (c:\android-sdk in my case).
Next plug-in your device.
Now, select File -> Build & Run, this will open the Build Settings window. Select Android under platform and then click on the Build & Run button, when prompted for a name for the .apk file enter in RedCube.
A build dialog will pop up and you will see the app being built followed by a message about the app getting pushed to your device.
Have a look at your device, you should see the RedCube app starting up, followed by a red cube spinning on a blue background.
Congratulations you have created your first Unity Android app !
If you are interested in creating 2D games with Unity then check out my Run Bunny, Run! tutorial series.
Otherwise go and complete the some of the Unity tutorials. These will give you a good understanding of how Unity works. Also check out the very comprehensive documentation and the very helpful community.
Have fun :)
If you want to make games, Unity is a tool you should look at. It allows you to easily create games (both 3D and 2D) for a variety of platforms including Windows, Linux, Mac , Web , iOS, Android and Windows Phone. It also has a free version and if you ever need the pro version it is reasonable cheap to buy or subscribe to.
Check out some of the features in the upcoming version:

Here are some links to get you going:
Go Nuts and build the next Flappy bird!
Oops it has been a while since I last posted but I have actually been working on the game!
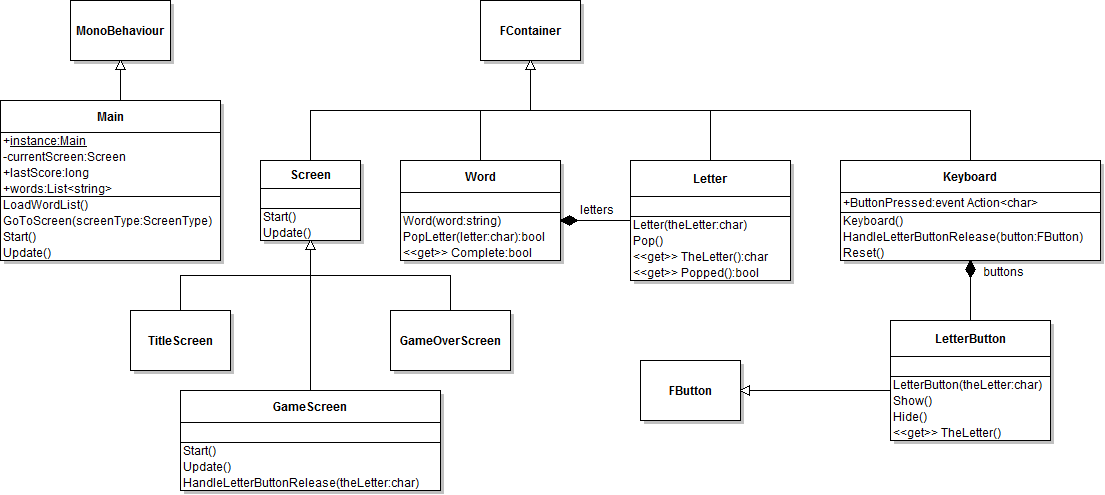
As I mentioned in at the end of my last post, the plan was to get the game working end to end. First off I created a number of new classes most extending FContainer. LetterButton for each of the letter buttons that the player can tap, Letter for each of the letters of the word, Keyboard to hold and manage the letter buttons and Word to manage the word.
Creating these classes allows me to use the tweening library to animate buttons, words and letters appearing and disappearing. I also added handlers to these classes so that they can callback into the main game code when things happen such as a player tapping a button.
Here is a class diagram of the classes in the game:
In the GameScreen’s Update() method I added some code to increment a time value every second of play. This method also holds a game over check which bounces the user to the game over screen if they exceed 120 seconds of time. For the moment I have also added a simple bar sprite that I resize to represent the time that has passed. I turn this into a more self contained class the future.
Here is the code for the Update() method:
override protected void Update()
{
      // inc the framecount
    framecount++;

      // has a second passed? Futile runs at 60fps
    if (framecount % 60 == 0)
    {
          // inc time and score
        time++;
        score+=5;

           // tween progress bar to new position
        Go.to(progBar,0.99f,new TweenConfig().floatProp("width",time*6.5f).setEaseType(EaseType.Linear));

           // has the player run out of time?
        if (time > 120)
        {
               // yep, stash their score and bounce them to game over screen
            Main.instance.lastScore = score;
            Main.instance.GoToScreen(ScreenType.GameOverScreen);

        }
    }
}
You will also notice the score increment that adds 5 points for every second that the player has survived.
The bulk of the game logic sits in the HandleLetterButtonRelease() method. This is called when a letter button is pressed by the Keyboard class:
private void HandleLetterButtonRelease(char theLetter)
{
      // was the letter in the word?
    if (word.PopLetter(theLetter))
    {
          // yep, give the user more time and play a good beep
        time -=1;
        FSoundManager.PlaySound("ok_beep");
    }
    else
    {
           // nope, penalise a wrong guess and play bad beep
        time+=2;
        FSoundManager.PlaySound("bad_beep");
    }

      // is the word complete?
    if (word.isComplete())
    {
          // give the player 10 more seconds of play time
        time-=10;

          // play word done sounds and give player 500 points
        FSoundManager.PlaySound("word_done");
        score+=500;

        // tween the word off the screen and then...
        Go.to(word, 0.2f, new TweenConfig ().
        setDelay(1.0f).
        floatProp("scaleY", 0.5f).
        floatProp("alpha", 0f).
        setEaseType(EaseType.BackInOut).onComplete(c => {

               // remove the word from the stage
            word.RemoveFromContainer();

               // grab another word from the list of words
            wordPos += (int)RXRandom.Range(1,20);
            if (wordPos > Main.instance.words.Count)
            {
                wordPos = (int)RXRandom.Range(1,50);
            }

               // create a new Word and add it to the stage
            word = new Word (Main.instance.words [wordPos]);
            word.y = 35;
            AddChild(word);

               // reset the keyboard showing any letters buttons that were hidden
            keyboard.Reset();

        }));
    }

      // Pin the minimum time value to 1, award 1000 points if player manages to wind the clock this low
    if(time < 1)
    {
        time =1;
        score+=1000;
    }
}
I also dropped in some placeholder SFX and background track to round things off. Here is a clip of the final result:
Play testing
Proud of my work I handed the game over to Mrs Gremlin… she hated it! After a Q&A session it turns out that a) she doesn’t really like word games but more importantly b) the word list was awful.
Even though I had sanitized the list, she felt that the words were just too obscure. For instance “fashioned” was “not a real word”. So I went back to the drawing board and found a list of the 1000 most common words from texts in the Gutenberg Project. I quickly wrote some code to score each word (using the same algorithm I detailed here), sorted the list and dropped the list into the game.
This time Mrs G got into the game (particularly when she found out my top score was 7000ish which gave her a target to beat).
Since then I have shopped the game around my friends and acquaintances to get feedback. The highlights of this feedback are:
So quite a bit to work on. Having said that no one thought the game was terrible and most played several games so I’m hopeful that I have something interesting here.
As this slightly over the top presentation shows adding motion, bounce and wiggle to your game elements can really make a game feel rich and alive:
Luckily this is easy to achieve with the GoKit tweening library that is included with Futile. The library allows you to easily change any property of an object over a specific period of time.
For instance this bit of code:
skyline.scaleY =0.1f;
Go.to(skyline, 0.75f, new TweenConfig ().
      floatProp("scaleY", 1.0f).
      setEaseType(EaseType.BounceOut));
Sets the skyline sprite’s y scale to 0.1, it then uses the GoKit tweening library to scale the skyline sprite’s Y scale back to 1 over a period of 750ms with an ease of BounceOut.
The effect of this is have the skyline spring out of the ground with a nice cartoony bounce. Adding some tweens to the title screen’s sprites like this:
private void AnimateIntro()
{
    bg.y = Futile.screen.height+70;
    bg.rotation = 10f;

    Go.to(bg, 0.5f, new TweenConfig ().
        setDelay(0.5f).
        floatProp("y", 0f).
        floatProp("rotation", 0f).
        setEaseType(EaseType.BounceOut));

    skyline.scaleY =0.1f;
    Go.to(skyline, 0.75f, new TweenConfig ().
        setDelay(1.0f).
        floatProp("scaleY", 1.0f).
        setEaseType(EaseType.BounceOut));

    title.scale = 0.001f;
    Go.to(title, 0.3f, new TweenConfig ().
        setDelay(1.5f).
        floatProp("scale", 1.0f).
        setEaseType(EaseType.SineOut));

    nuke.scaleY = 0.001f;
    Go.to(nuke, 0.5f, new TweenConfig ().
        setDelay(2.3f).
        floatProp("scaleY", 1.0f).
        setEaseType(EaseType.BounceOut));

    startButton.scaleY = 0.0f;

    Go.to(startButton, 0.5f, new TweenConfig ().
        setDelay(3.2f).
        floatProp("scaleY", 1.0f).
        setEaseType(EaseType.BounceOut));

    helpButton.scaleY = 0.0f;

    Go.to(helpButton, 0.5f, new TweenConfig ().
        setDelay(3.3f).
        floatProp("scaleY", 1.0f).
        setEaseType(EaseType.BounceOut));
}
Along with a tween to make the buttons disappear when we tap them on the game screen, gets us this:
So how exactly do these tweens work? Well it’s all down to some clever maths. The GoKit library implements what are known as the Robert Penner equations which are a set of equations that he published in a book called Programming Macromedia Flash MX. These equations can be used to produce organic feeling motions and change.
Basically these equations all take the form of a function that takes 4 parameters:
The simplest of these doesn’t in fact result in any easing, it simply creates a linear motion:
public float EaseNone( float t, float b, float c, float d )
{
    return c * t / d + b;
}
Plotting this out on graph gives us this (with a starting point of 0, a change of 1, over 60 frames):

The bounce out equation is a bit more interesting:
public float EaseOut(float t, float b, float c, float d)
{
    if ((t /= d) < (1 / 2.75))
    {
      return c * (7.5625f * t * t) + b;
    }
    else if (t < (2 / 2.75))
    {
      return c * (7.5625f * (t -= (1.5f / 2.75f)) * t + .75f) + b;
    }
    else if (t < (2.5 / 2.75))
    {
      return c * (7.5625f * (t -= (2.25f / 2.75f)) * t + .9375f) + b;
    }
    else
    {
      return c * (7.5625f * (t -= (2.625f / 2.75f)) * t + .984375f) + b;
    }
}
Plotting this out looks like this:

Which is a much more interesting motion.
All in all there are 31 different eases in the library. This chart shows them all:

Next up I’m going to kick things up a notch and get the basic game play in place.
 Next up is some “boring” housekeeping work on the code. Eventually the game will consist of four screens. If I keep up with my current approach of putting everything in a single script things will get pretty messy, pretty fast.
Luckily there is a better way which is highlighted in the Futile videos and in the Banana Demo project . The idea is to subclass the FContainer for each screen and then add and remove these objects from the Futile stage.
First off I create an enumeration defining each of the screens:
public enum ScreenType
{
    TitleScreen,
    GameScreen,
    ScoreScreen,
    HelpScreen
}
Then I created a base class which, extends FContainer, for my screens:
public abstract class Screen : FContainer
{
    override public void HandleAddedToStage()
    {
        Futile.instance.SignalUpdate += Update;
        base.HandleAddedToStage();
    }

    override public void HandleRemovedFromStage()
    {
        Futile.instance.SignalUpdate -= Update;
        base.HandleRemovedFromStage();
    }

    public abstract ScreenType Type
    {
        get;
    }

    abstract public void Start();

    abstract protected void Update();
}
The Start() method will be called just after the screen object is created. This is where we will create all our FSprites etc for the screen. The Update() method is where we can stick any logic that needs to be updated every frame. I overrode HandleAddedToStage() and HandleRemovedFromStage() to clue Futile into the fact that it needs to call (or stop calling) the Update() method. Lastly I created the Type property so that the main script can figure out what type a screen is at run time.
Here is the (redacted) code for the TitleScreen:
public class TitleScreen : Screen
{
    private FButton startButton;
    private FSprite bg;
    private FSprite nuke;
    private FSprite skyline;
    private FSprite title;

    override public void Start()
    {
        bg = MakeSprite("Background.png", 0f, 0f);
        AddChild(bg);

        nuke = MakeSpriteWithBaseLine("nuke.png", 0f, -Futile.screen.halfHeight + 50);
        AddChild(nuke);

        skyline = MakeSpriteWithBaseLine("skyline.png", 0f, -Futile.screen.halfHeight);
        AddChild(skyline);

        title = MakeSprite("Title.png", 0f, 180f);
        AddChild(title);

        startButton = MakeButton(0f, 0f, "START");
        AddChild(startButton);
        startButton.SignalRelease += HandleStartButtonRelease;
    }

    private FSprite MakeSprite(string name, float xPos, float yPos)
    {
        FSprite sprite = new FSprite (name);
        sprite.x = xPos;
        sprite.y = yPos;

        return sprite;
    }

    private FSprite MakeSpriteWithBaseLine(string name, float xPos, float yBaseline)
    {
        //...
    }

    private FButton MakeButton(float xPos, float yBaseline, string buttonText)
    {
        //...
    }

    public override ScreenType Type
    {
        get { return ScreenType.TitleScreen; }
    }

    override protected void Update()
    {
        // do nothing
    }

    private void HandleStartButtonRelease(FButton button)
    {
        Main.instance.GoToScreen(ScreenType.GameScreen);
    }
}
The MakeSprite(), MakeSpriteWithBaseLine() and MakeButton() methods are some helper methods to simplify the code. As you can see the Start() method is where all the components of the title screen are created. Since the title screen doesn’t have any frame based animation the Update() method is empty.
Lastly HandleStartButtonRelease() is set up as the method that is called when the start button is pressed. It calls the GoToScreen() method on the Main class to switch to the GameScreen. I’ll cover this in more detail below.
Main is a subclass of MonoBehaviour and is the script that is attached to the “Futile” object in the games’s scene. It looks something like this:
public class Main : MonoBehaviour
{
    public static Main instance;
    private Screen currentScreen = null;
    private FStage stage;

    // Initialise Futile and get the ball rolling
    void Start()
    {
        instance = this;

        FutileParams fparams = new FutileParams (true, true, false, false);

        //...

        Futile.instance.Init(fparams);

        //...

        stage = Futile.stage;

        //...

        // and lastly show the title screen
        GoToScreen(ScreenType.TitleScreen);
    }

    public void GoToScreen(ScreenType screenType)
    {
        if (currentScreen != null && currentScreen.Type == screenType)
        {
            return; //we're already on the same page, so don't bother doing anything
        }

        Screen screenToCreate = null;

        switch (screenType)
        {
            case ScreenType.TitleScreen:
                {
                    screenToCreate = new TitleScreen ();
                    break;
                }
            case ScreenType.GameScreen:
                {
                    screenToCreate = new GameScreen ();
                    break;
                }
        }

        if (screenToCreate != null)
        {
            //destroy the old page and create a new one
            if (currentScreen != null)
            {
                stage.RemoveChild(currentScreen);
            }

            currentScreen = screenToCreate;
            stage.AddChild(currentScreen);
            currentScreen.Start();
        }

    }

    // This is called by unity every frame
    void Update()
    {
        // check if back key was pressed
        if (Input.GetKeyDown(KeyCode.Escape))
        {
            switch (currentScreen.Type)
            {
                case ScreenType.TitleScreen:
                    {
                        Application.Quit();
                        break;
                    }
                case ScreenType.GameScreen:
                    {
                        GoToScreen(ScreenType.TitleScreen);
                        break;
                    }
            }
        }
    }
}
The Start() method here sets up Futile, sets up a static reference to the instance of Main for easy access by the screens and lastly calls the GoToScreen(ScreenType.TitleScreen) method to get the ball rolling and show the title screen.
GoToScreen() first checks that we aren’t already on the screen that has been requested. Next up it creates an instance of new screen. If there is an existing screen it removes it from the stage (so it gets garbage collected). It then adds the new screen to the stage and calls it’s Start() method so the screen can set itself up.
One thing to note is that I currently only have the TitleScreen and GameScreen plumbed in. The switch statement will need to be expanded for the help and score screens.
Lastly the bit of code in the Update() method is there to allow the back button to work for Android. If I ever port this game to iOS I will need to add some on screen buttons to achieve the same thing.
Here is a clip of this all in action:
The next post in this series can be found here
So I need to find some words, more importantly I need a list of words that gradually gets more and more difficult to guess.
So what makes a word hard to guess? Doing some research on the web turns up a couple of interesting posts such as this one and this one.
It turns out that short words are harder to guess, especially ones that have “non-obvious” letters. Thus words such as “jazz”, “jug”, “by” and “gym” are much harder to guess then words such as “deployments”, “historical” or “compartmentalised”.
The list of words I have decided to use scores each word based on the relative frequencies of letters in the English language.
So “jazz” scores: j(0.153) + a(8.167) + z(0.074) = 8.394.
Whereas “deployments” scores: d(4.253) + e(12.702) + p(1.929) + l(4.025) + o(7.507) + y(1.974) + m(2.406) + n(6.749) + t(9.056) + s(6.327) = 56.928.
Lower scores indicate words that are harder to guess when you have a limited number of turns.

Letter frequency for the English language – source Wikipedia
As the blog post points out this algorithm is not perfect “cup” scores 7.469 but “gym” scores 6.396. The reality is that if “_y_” is guessed ( players often work through the vowels and then onto “Y”) there isn’t a lot of options but “gym”. However if you guess “_u_” there is quite a lot of options besides “cup”. So actually “cup” should be a harder word to guess then “gym”.
However for my purposes this list will do very nicely. Unfortunately it’s 173528 words long which is a wee bit bigger then I need :) Also my design only allows me to display words with a length of 10 characters or less so I need to cull words longer then 10 characters as well.
Enter the pig
Apache Pig is something that I have used in the past when working with “Big Data” datasets. The word list isn’t exactly Big Data but Pig will happily suit my word list mangling needs.
First off I only want words that are between 2 and 10 characters. Next I only want a sample of the 173528 words. Lastly I want the list sorted from easiest to hardest. Here is my script:
allWords = LOAD 'allscores.txt' USING PigStorage() AS (word:chararray, junk, score:float);
lessThen10 = FILTER allWords BY SIZE(word) <= 10 AND SIZE(word) > 1;
shortList = SAMPLE lessThen10 0.02;

groupAll = GROUP shortList ALL;
wordsWithMaxScore = FOREACH groupAll GENERATE FLATTEN(shortList), MAX(shortList.score) AS maxScore;

wordsWithRatio = FOREACH wordsWithMaxScore GENERATE shortList::word AS word,shortList::score AS score,
                 maxScore, (shortList::score/maxScore) AS ratio;

ordered = ORDER wordsWithRatio BY ratio DESC;
justWords = FOREACH ordered GENERATE word;

STORE ordered INTO 'wordsAndScores' USING PigStorage();
STORE justWords INTO 'words' USING PigStorage();
This produces two files, one with the words, their scores and a calculated ratio (0 to 10) based on the words score vs the maximum score in the sample list of words (wordsAndScores):
tendrilous 66.33   66.33   1.0
breathings  65.555  66.33   0.988316
rediscount  65.087  66.33   0.9812603
inoculated  64.965  66.33   0.979421
atrophies   64.735  66.33   0.9759535
stewarding  64.582  66.33   0.9736469
tailenders  64.232  66.33   0.96837026
nonethical  64.048  66.33   0.9655962
authorized  63.564  66.33   0.9582994
destroying  63.537  66.33   0.9578923
The second file (words) contains just the words:
tendrilous
breathings
rediscount
inoculated
atrophies
stewarding
tailenders
nonethical
authorized
destroying
Each file contains 2477 words sampled out of the original list of 173k words.
I was initial going to use the ratio to group blocks of similar difficulty words together but have abandoned this idea. The plan is now to simply step through the list in random increments which will have the effect of gradually increasing the difficulty of the words during a game but not result into too many words repeating between games.
One problem with the list is that it contains words that are not in common usage for example “tendrilous” (adjective for “tendril”, a specialized threadlike leaf or stem that attaches climbing plants to a support by twining or adhering) and “kohlrabies” (plural of “kohlrabi”, A cabbage of a variety with an edible turnip like swollen stem). So I will need to manually groom the list at some stage :)
Loading the word list
Loading the word list in Unity is pretty straight forward. Firstly I copy the file into my project’s resource folder and name it words.txt, next I use the following code to load the words into a string list:
List words;

void LoadWordList()
{
    words = new List ();
    StringReader reader = null;

    TextAsset words = (TextAsset)Resources.Load("words", typeof(TextAsset));

    reader = new StringReader (words.text);
    if (reader == null)
    {
        Debug.Log("words.txt not found or not readable");
    } else
    {
        string txt;

        // Read each line from the file
        while ((txt = reader.ReadLine()) != null)
        {
            words.Add(txt);
        }
    }

    Debug.Log("Loaded " + words.Count + " words");
}
With the word list in place, I think I will next focus on getting the game’s screen flows sorted. Onwards and upwards!
_Update: _Click here for the next post in this series
So I’ve decided to knuckle down and build AND actually release a game. I read somewhere (probably Reddit) that publishing a development diary really helps on the motivation front. It sounds like a good idea so here we are :-)
Some constraints
First off to narrow my focus I have decided that:
Time
Nothing kills a side project like the distractions of everyday life. Luckily Mrs Gremlin suggested a few weeks ago that I earmark Monday nights for doing some game development. I’m taking her up on her offer. My wife is the best!
but Unity isn’t 2D…
No it isn’t but it handles lots of polygons which when textured and put on a plane equals lots of GPU accelerated sprites.
After digging around I found Futile. It’s new, has zero documentation but the intro videos and sample code looked good.
The developer also set up a Futile sub-reddit and he is very active on it. So I decided to give it a go.
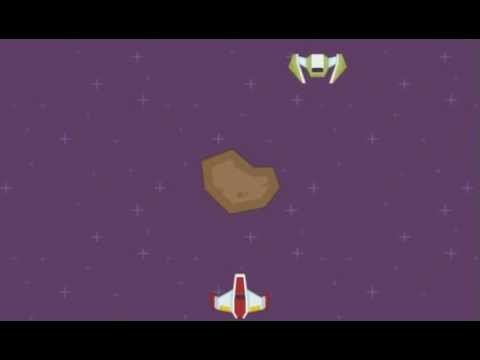
I knocked together a shell of a space invader game using these neat graphics. Futile appears to do exactly what it says on the tin and it seems intuitive to use. Here is a short clip of my test project:
The pitch
Ok now for the elevator pitch:
The game is hangman with a time limit rather then guess limit. When a player guesses a word they are presented with a new one. The words the player gets to guess get progressively harder as the game goes one. The game has a time limit of 120 seconds with a progress bar incrementing towards game over every second. Each correct letter guess reduces the bar by 2 seconds. Each failed guess adds 1 second. Completing a word knocks off 10 seconds.
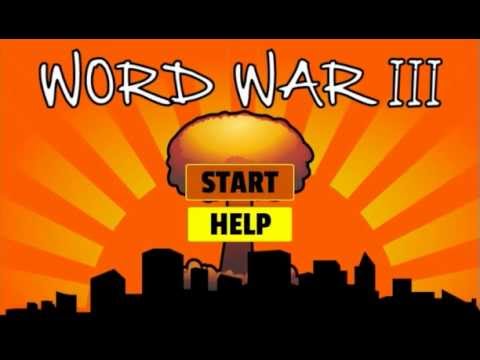
The game has a nuclear armageddon theme. The progress bar is broken up into DEFCON levels 5 to 1. The game is named “Word War III”.
Kick off
First up I sketched out some screen flows and layout ideas. Things like high score tables etc can come later:

Mrs Gremlin offered to build a title page for me (using Illustrator) and I knocked up the game page to test out the layout of the letter keys. I’m normally create game graphics using Inkscape which is vector based, this allows graphics to be easily scaled and resized as things develop. Here is the title page and the game page layout test:


The fonts are Passion One and Hand of Sean. Unfortunately it looks like the license for Hand of Sean has recently changed and it is no longer free so I’ll need to find a replacement for it.
Using BMFont I created some font atlases and then used TexturePacker (I bought the Pro version) to pack all the assets into the following atlas:

One issue I had is that I failed to export the font images as 32bit images. This caused all sorts of weirdness when TexturePacker created the atlas.
Also Futile spat the dummy when tring to load the smaller of the font sets. Some array index out of bounds error that I haven’t had time to track down.
Next I got down to some actual coding using the FSprite, FLabel and FButton classes I created the game screen. Testing on a actually device showed that my buttons were too small. Mrs Gremlin also pointed out that the keys should laid out in a QWERTY fashion. Some more tweaking and I ended up with this:
Not a bad start for a few hours of work.
Update: Click here for the next post in this series
Actually it’s more what I did last month.
RC simulator
A mate of mine bought himself a swish RC quad-copter. As part of the package he bought Phoenix RC. It is a simulator that allows you to plug your RC controller into a PC and you can then practice flying (and crashing) virtual RC models before tackling the real ones. Very useful and it clearly proved that I should never attempt to fly a real RC helicopter.
Kinect
Believe it or not, I’m actually getting paid to hack a Kinect. Im using the OpenNI framework so hacking really consists of installing the software and then using a nice high-level framework that does all the hard work for you. I’ve been very impressed with the skeleton tracking. I’ve been able to simultaneously track 3 people with full skeletons without any issues. This is the guide I used to install the base software. You should also check out the Ogre and Unity demos.
Unity
Whilst tinkering with the Kinect I ran through the Unity 3D platformer tutorial. Unity is very impressive. If you want to create a 3d game I’d start here. The basic version is free. The cross platform nature of the engine is impressive to.
Auckland Buses app
I finally got around to releasing my Auckland Buses app for Android. It only took a few hours to put together. I’m experimenting with an ad supported model. The app has about 225 users, averages around 25 impressions a day. So far I’ve made 49c so not really a money maker :) What is interesting is the fairly poor fill rates I get some days. If you had marketing dollars to spend, mobile ads might be the way to go as not many people seem to be tapping them.
That’s about it…