Tip: Creating easy to remember passwords

Passwords are a pain in the butt, if you use a computer or the Internet then you no doubt have a list of passwords bouncing around in your skull or worse yet a single password that you use everywhere! Here is a simple technique for creating good, easy to remember passwords.
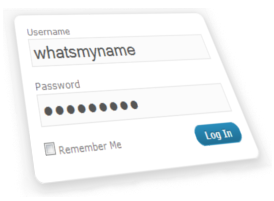
Password inputFirst off here are some golden rules for passwords:

  1. A password needs to be strong (see below)
  2. You should only use a password for one site or account
  3. You should never write a password down
  4. You should never tell anyone else your password (duh)

Of course all of us break these rules…

So what is a good password? A good password is one that is “strong” from a security point of view. Typically this means a string of 8 characters made up of numbers and letters. Additionally the password should not contain any “dictionary” words (e.g. a word you find in the dictionary) nor should it contain information relating to you, such as your name or date of birth.

On top of that, your password should not be a common one. Believe it or not, people tend to think just like you and so there is a whole raft of passwords that people tend to use such as qwerty, 7777777, bond007, butthead, trustno1. This list (from Twitter’s sign-up) page contains 370 common passwords which Twitter does not allow to be used. Needless to say, if one of your passwords is on this list then you should probably not use it :)

Here are 10 “strong” passwords generated using the excellent from pctools.com password generator.

ne3hebr4 fe5ec7ur
th55ucep 2rayaves
24astete 8hacruth
fathu4e7 5rubrast
tebra2ep 4awraph4

Now these passwords are all well and good but you are not likely to memorise them are you? Which means you will either write them down or you will just memorise one, which you would use everywhere. Once again breaking the rules.

So here is better way, which not only generates strong passwords, unique to each website but also makes them easy to remember !

First off choose 4 characters, a mix of letters and numbers (ideally more numbers then letters). These 4 characters are the only thing you will need to remember. For instance r085, which I will use in the examples below.

Next up, when you need a password for a website, take the first 4 characters of the website’s domain name and alternate them with the characters in your secret 4 character string, for example:

facebook.com:
                f a c e
                   +      = fra0c8e5
                 r 0 8 5 

twitter.com     t w i t
                   +       = trw0i8t5
                 r 0 8 5 

gmail.com       g m a i
                   +       = grm0a8i5
                 r 0 8 5 

digg.com        d i g g
                   +       = dri0g8g5
                 r 0 8 5

And voila you get nice strong passwords, unique to every site !

Configuring a test SSL certificate for Jboss

I just had to set up a test certificate for my local install of Jboss 4.2.3 to try out some SSL code. It wasn’t completely obvious so here are some notes on how to do it.

First off you need to create a self-signed certificate. You do this using the keytools application that comes with Java. Open a command prompt and run the following command. You will need to change the path to your Jboss conf directory to reflect your install:

C:\>keytool -genkey -alias tomcat -keyalg RSA -keystore C:\jboss-4.2.3.GA\server\default\conf\localhost.keystore

When prompted use a password of changeit everywhere. It’s important that you answer localhost to the first question:

Enter keystore password: changeit
Re-enter new password: changeit
What is your first and last name?

What is the name of your organizational unit?
  [Unknown]:
What is the name of your organization?
  [Unknown]:
What is the name of your City or Locality?
  [Unknown]:
What is the name of your State or Province?
  [Unknown]:
What is the two-letter country code for this unit?

Is CN=localhost, OU=Unknown, O=Unknown, L=Unknown, ST=Unknown, C=NZ correct?


Enter key password for
        (RETURN if same as keystore password): changeit
Re-enter new password: changeit

Next up you need to configure tomcat to create a SSL connector.

Edit C:\jboss-4.2.3.GA\server\default\deploy\jboss-web.deployer\server.xml and find the commented out SSL connector example, uncomment it and tweak it as follows:

<Connector port="8443" protocol="HTTP/1.1" SSLEnabled="true"
maxThreads="150" scheme="https" secure="true"
clientAuth="false" sslProtocol="TLS"
keystoreFile="${jboss.server.home.dir}/conf/localhost.keystore"
keystorePass="changeit"
/>

Finally add two System properties to your Jboss startup command to get the javax.net.ssl library to use your new keystore. These are only needed if you need to make SSL calls back to yourself. I needed them because I had CAS and 3 apps authenticating with CAS all running in the same dev Jboss instance:

-Djavax.net.ssl.trustStore=C:\jboss-4.2.3.GA\server\default\conf\localhost.keystore
-Djavax.net.ssl.trustStorePassword=changeit

Ok now browse to http://localhost:8443/

Your browser will complain about a self-signed certificate. Just follow your browser’s instructions to add this certificate as a security exception so you won’t be prompted again and you are all done.

Inside Google Wave

ClearPoint held one of its regular tech-drop get-togethers last night covering Google Wave.

The Cloudbreak team gave a good walk-through of the product  and I gave a quick overview of some of the technology inside Google Wave and it’s APIs.

Here is my slide deck:


Click to see next slide

The PDF (with notes) can be downloaded here.

For those of you who know nothing about the wave, here is short intro video:

YouTube Preview Image

Vodafone NZ settings for Android phones

I have an Android G1 Developer phone (based on the HTC Dream) and have had major issues getting MMS to work with the Vodafone network in New Zealand. Vodafone was next to useless in resolving this problem but after bashing my head against a wall for ages and “phoning a friend” (thanks Nick) I finally have a configuration that works.

Interesting enough I actually resorted to debugging my phone to see where the issue was and then took a wander through the Android source code to see why things were going wrong. In the end it turned out to be simple case sensitivity issue with the APN type field for the MMS APN  (it must all be in lowercase) !

So in case anyone else is having the same issue here are the details of the two APNs you need to setup. These should work for any Android based devices:

Name: Vodafone NZ
APN: www.vodafone.net.nz
Proxy: <not set>
Port: <not set>
Username: <not set>
Password: <not set>
Server: <not set>
MMSC: null
MMS Proxy: <not set>
MMS Port: <not set>
MCC: 530
MNC: 01
APN Type: default
Name: Vodafone NZ-MMS
APN: live.vodafone.com
Proxy: <not set>
Port: <not set>
Username: <not set>
Password: <not set>
Server: <not set>
MMSC: http://pxt.vodafone.net.nz/pxtsend
MMS Proxy: 172.30.38.3
MMS Port: 8080
MCC: 530
MNC: 01
APN type: mms

SvnViz 1.0.0 Released

Finally got off my butt and packaged up version 1.0.0 of SvnViz. It can be downloaded from sourceforge.

SvnViz builds visualizations of the activity within a Subversion repository. Here is an example of the default visualization run against the project that I am currently working on. Green dots indicate file adds, blue dots are modified files and red dots are deleted files. The greater the activity of the user the higher their score.

YouTube Preview Image

SvnViz also provides a framework for creating your own visualizations. Simply extend the FrameViz class and implement the generateFrame method. To run your vizualization class, instead of the default class, just pass the fully qualified name of your class to the application using the -vc parameter.

Source files can be downloaded from here. All code is released under the GPL.

Have fun and drop me a line if you come up with an interesting visualization.

Expose /var/www using Samba

This is actually more of a note for myself but it may be of use to you. I often find myself running up Linux VMs to test and build LAMP based systems but since I (generally) use Windows it is a major pain to have to transfer files via scp or worse edit files using vi.

However is you install Samba into your test VM, you can simply browse to the folder using Windows explorer and edit the files directly. The following configuration exposes your /var/www folder via Samba and makes its content editable by everyone. It makes the files read/writeable by all and makes sure that www-data remains the owner.

Needless to say this configuration is very very insecure and MUST NOT be used in production !

`This is actually more of a note for myself but it may be of use to you. I often find myself running up Linux VMs to test and build LAMP based systems but since I (generally) use Windows it is a major pain to have to transfer files via scp or worse edit files using vi.

However is you install Samba into your test VM, you can simply browse to the folder using Windows explorer and edit the files directly. The following configuration exposes your /var/www folder via Samba and makes its content editable by everyone. It makes the files read/writeable by all and makes sure that www-data remains the owner.

Needless to say this configuration is very very insecure and MUST NOT be used in production !

`

Cross-browser testing and virtualization

_Update: The latest images from Microsoft now ONLY work under MS Virtual PC ! Not so useful if you are a Mac developer or you want to run under VMware like we are. Microsoft is aware of the problem, hopefully they fix it soon.

_

I’ve been setting up a bunch of VMware images for testing various browser and OS combinations. This has worked out very nicely and the best thing is you can do it all for free !

In my travels I came across these very useful images from Microsoft, basically XP and Vista installs with various flavours of Internet Explorer ( 6, 7 and 8 ) installed.

These are free for download (but they do expire) and can be easily run using Microsoft’s free Virtual PC.

To get these images to run under VMware, you first need to set up the images to run under Virtual PC (to create a .vmc file) and then you can converted the images to the VMware format using the VMware vCenter Converter. This tool is also free.

The VMware Converter is also able to create an image of your locally installed OS, I haven’t tried this but it could be useful for backups and the like.

All up its taken about 2 days to set up XP, Vista & Ubuntu images running combinations of IE 6, IE 7, IE 8, Firefox 3, Opera 9, Safari 4 and Chrome.

Now the fun really starts….

Facebook: Keeping things between friends

One of the most visited posts on my blog is titled “FaceBook:Do you know who is watching you?” which details how to keep your Facebook profile out of the public eye. In light of the MI6 chief/Facebook scandal (his wife obviously doesn’t read my blog), I thought I’d update the instructions so you can avoid suffering a similar embarrassment :)

  1. Log in to Facebook and from the Settings menu (top right of the page) select Privacy Settings
  2. Now select the Profile section (alternatively click on this link: http://www.facebook.com/privacy/?view=profile&tab=basic)
  3. Set all the options to Only Friends and click on the Save Changes button
  4. Now select the Contact Information tab (or follow this link: http://www.facebook.com/privacy/?view=profile&tab=contact)
  5. Once again set all the options to Only Friends and click on the Save Changes. If you don’t want your friends to know your email then you can select No one as the option for your email address too.
  6. Click on the Privacy part of the breadcrumb at the top of the page and the select the Search section (or follow this link: http://www.facebook.com/privacy/?view=search)
  7. For the Search Visibility option you have a couple of choices. If you are completely a paranoid set it to Only Friends. If you are slightly paranoid then set it to Friends of Friends. If you don’t care then select one of the other options such as Everyone.
  8. In the Search Result section you can control what people can see when they do search for you. I would suggest leaving only the A link to add me as a friend and A link to send me a message options selected. You can also turn on My profile picture but it all depends on how compromising your profile pictures get :)
  9. Lastly in the Public Search Listing section uncheck the create a public search listing for me… option because you don’t want your profile showing up on Google.
  10. Click on Save Changes and you are all done.

Happy Facebooking…