Logo was one of first programming languages (after BASIC) that I really learned in depth. The most famous aspect of Logo is its turtle graphics which simulates a tiny turtle to which you can give commands such as forward, backward, left turn and right turn. As the turtle moves on the screen it draws a line behind it.
With its graphical feedback, turtle graphics is an ideal way to introduce people to programming. Today I thought I’d go over some examples. I’m not going to use Logo but rather the Python programming language which has a turtle graphics module.
First steps, install Python and then launch IDLE (the Python installer should have created a short-cut). Now enter in the following (press Enter at the end of each line):
from turtle import *
showturtle()
You should see window with a black arrow in it. This is the turtle. Now type
forward(100)
The turtle should now move forward 100 turtle steps. Next enter the following lines:
right(90)
forward(100)
left(90)
forward(100)
The right and left commands turn the turtle the number of degrees you specify. It gets a little tedious to type these out the whole time so there is a shorthand. Try these commands:
bk(50)
fd(50)
rt(45)
lt(45)
Ok let’s try something more interesting. We are going to draw a square but first let’s clear the screen:
clearscreen()
Now the square:
fd(100)
rt(90)
fd(100)
rt(90)
fd(100)
rt(90)
fd(100)
rt(90)
Nice. But what if you want to draw lots of squares. It would get very boring typing out all those commands over and over again. Let’s tell the computer how to draw a square (note the indentation of the lines, these are important):
def sq():
    fd(100)
    rt(90)
    fd(100)
    rt(90)
    fd(100)
    rt(90)
    fd(100)
    rt(90)
Now we can just type:
sq()
to draw a square! Try this:
sq()
rt(5)
sq()
rt(5)
sq()
Shiny, we are getting a neat pattern forming… but once again it’s too tedious. So enter this:
clearscreen()
speed(0)
for i in range(6):
    sq()
    rt(60)
The speed command makes the turtle move faster so we don’t have to wait. The for statement gets the computer to repeat a set of commands and the range(6) command creates the numbers 0 to 5, which means that the commands sq() and rt(60) are repeated 6 times. Lets add a fd command in each iteration (step) of the loop:
clearscreen()
speed(0)
for i in range(72):
    sq()
    rt(5)
    fd(20)
And we get a donut type thing. Finally lets go crazy and write a new command called polyspi that calls itself!
def polyspi(angle,inc,side,times):
    if times > 0:
        fd(side)
        rt(angle)
        polyspi(angle,inc, (side + inc),(times - 1))
This is called recursion and because it changes it’s side and times values when it calls itself, we_ _can generate all sorts of interesting patterns such as:
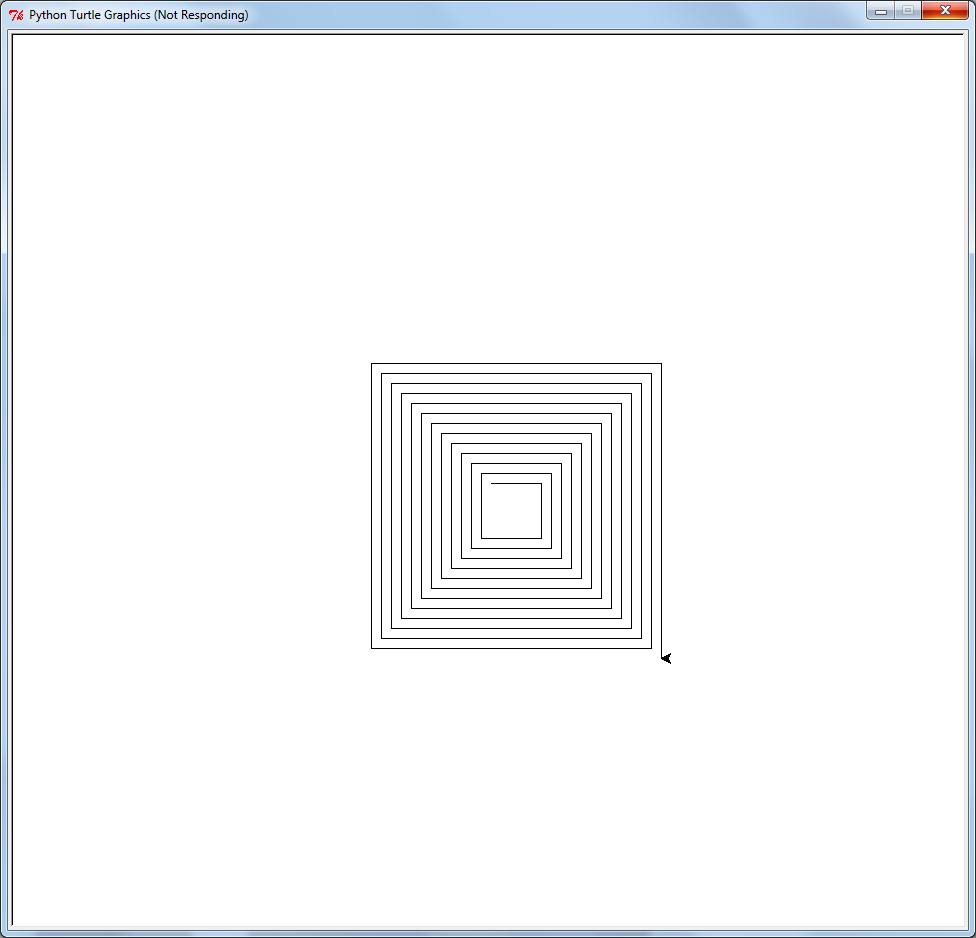
clearscreen()
speed(0)
polyspi(90,5,50,50)
or
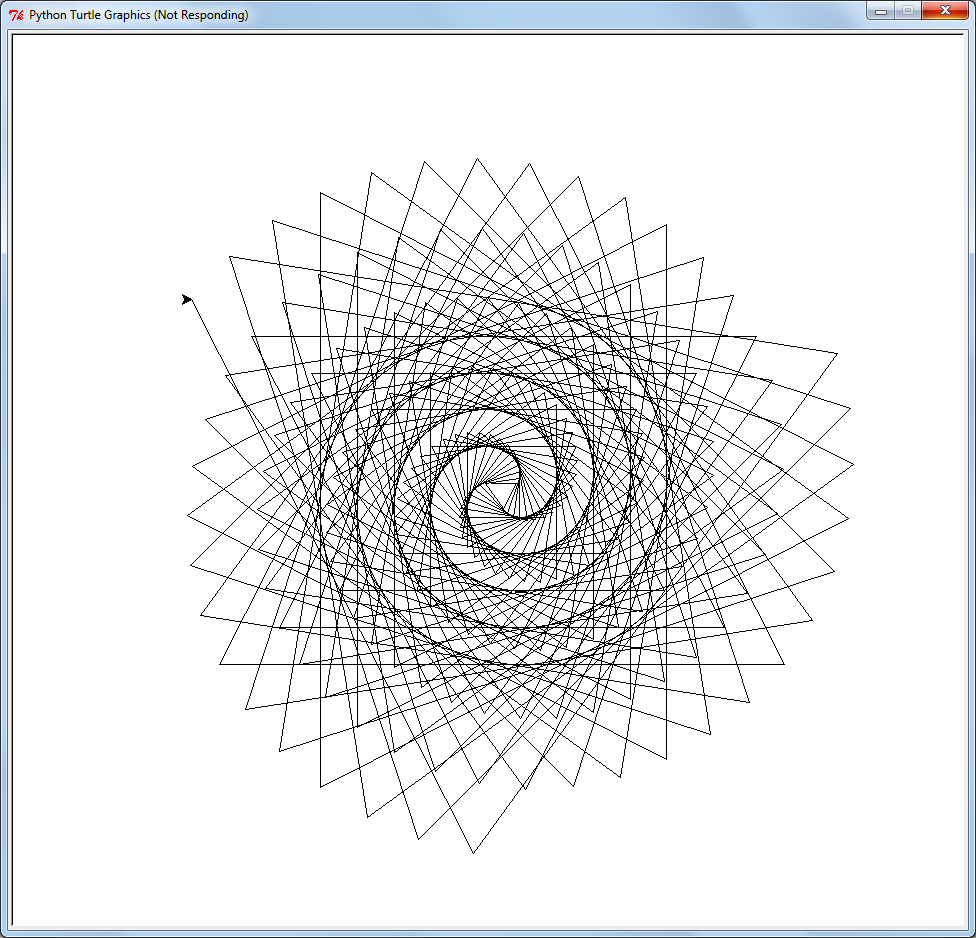
clearscreen()
speed(0)
polyspi(95,1,50,100)

or
clearscreen()
speed(0)
polyspi(117,3,25,200)
To find out more check out the Python turtle documentation. Have fun!