How Anonymous is attacking Mastercard et al.

During lunch I was browsing the web and catching up on the news, when I saw this image on an article by TechEye.net:

Apparently it is a call-to-arms flyer for Operation Payback which is being run by Anonymous and is an exercise in “retribution” against those companies and organizations seen to be censoring Wikileaks. What caught my eye was the statement towards the end of the flier:

Set your LOIC HIVE server to

loic.anonops.net, channel #loic

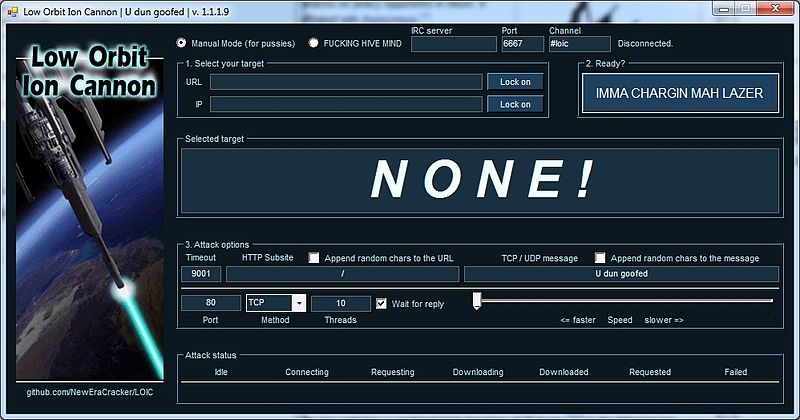
Curious, I did a Google search and discovered that LOIC is the “Low Orbit Ion Cannon”, a piece of software that floods a target server with TCP, UDP or HTTP requests. What is particularly scary is the simplicity of it’s user interface:

But it gets worse… LOIC features something called the HIVEMIND. This allows a user to turn over control of their LOIC app to a remote user, effectively it becomes a node on a “voluntary botnet” !

Listening to an IRC command channel a LOIC instance will obey commands such as:

!lazor targetip=127.0.0.1 message=test_test port=80 method=tcp wait=false random=true
!lazor start
!lazor stop

Needless to say anyone installing LOIC is taking several risks, firstly by installing software with dubious origins but more importantly by giving control to an anonymous group who are then performing DDOS attacks with their machine which is illegal in most countries.

It will be interesting to see how these attacks play out in the next few days and if they will be recorded as the battles of the first real cyberwar.

4 little words

I was horrified to see that the Department of Homeland Security has begun to seize the domains of copyright infringing websites. Now I’m all for copyright protection and theft is theft but this kinda of censorship is a slippery slope.

But it did get me thinking…

Since it is only the DNS entries that have been seized and you are still able to visit these sites if you know their IP address, wouldn’t be nice to have a DNS like way of remembering these IP addresses?

And so I give you the 4LW  ‘protocol’ (4 little words).

Basically you grab 256 words from the dictionary in the S/KEY RFC, then with a simple lookup table (where each octet of the IP address is mapped to a word in the dictionary) you can convert any IP address into 4 hopefully easy to remember words and back again.

For example:

The IP address for rabidgremlin.com is 174.143.242.193, if you run this through 4LW you get the following phrase: LICK GORY ULAN MUTT

Some others:

210.55.180.158 (google.com) = ROOM RED LULU IDEA

72.30.2.43 (yahoo.com)= ACHE ION ANA NAY

72.21.210.250 (amazon.com)= ACHE FUM ROOM WENT

65.49.90.35 (whitehouse.gov) = TEN OWL BLUR LAM

184.84.165.161 (dhs.gov) = MASH BAWD KANE JERK

Of course this is bit of a toy idea (only good for IPv4 etc) but the romantic in me can see these little 4 word phrases hidden away in cryptic emails or scrawled as defiant graffiti on buildings of certain organizations :)

For those of you who are interested here is the dictionary for 4LW. I created it by grabbing every 8th word (starting with the first one) from the S/KEY dictionary. A = 0, AID = 1, YARN=255 etc.

{ "A", "AID", "ANA", "ARC", "AT", "AWN", "BAR", "BET", "BOG", "BUG", "CAB", "COD", "COY", "DAD",
 "DES", "DOE", "DUE", "EGO", "ETC", "FAT", "FIR", "FUM", "GAP", "GIL", "GUY", "HAP", "HER", "HIT", "HOW", "ICY", "ION",
 "IVY", "JET", "JOY", "KIM", "LAM", "LEN", "LIT", "LOW", "MAN", "MEL", "MOD", "MUG", "NAY", "NIP", "NOV", "OAR", "OIL",
 "ORR", "OWL", "PAP", "PEP", "PIT", "PRO", "RAG", "RED", "RIP", "RUB", "SAG", "SEA", "SIN", "SO", "SPY", "TAD", "TEN",
 "TO", "TOY", "UP", "WAG", "WET", "WOW", "YES", "ACHE", "ADEN", "AIDS", "ALLY", "AMES", "ANNA", "ARGO", "AUNT", "AWAY",
 "BAIT", "BAND", "BARN", "BAWD", "BEAU", "BELT", "BETA", "BILL", "BLED", "BLUR", "BOHR", "BONE", "BORE", "BOYD", "BRIG",
 "BULL", "BURT", "CAFE", "CANE", "CASH", "CHAD", "CHIN", "CLAD", "CLUB", "CODE", "COLT", "CORD", "CRAG", "CUBE", "CURL",
 "DANG", "DATE", "DEAN", "DEFY", "DIET", "DISH", "DOME", "DOUR", "DRUB", "DUKE", "EACH", "EDDY", "ELBA", "EROS", "FAIL",
 "FAST", "FELL", "FILE", "FISH", "FLAT", "FLOW", "FOLK", "FORK", "FRAY", "FULL", "GAGE", "GAME", "GAVE", "GIBE", "GIST",
 "GLOW", "GOES", "GORY", "GREW", "GULF", "HAAG", "HALO", "HARM", "HAWK", "HEED", "HERE", "HIKE", "HOBO", "HONE", "HOST",
 "HUFF", "HURD", "IDEA", "IOWA", "JACK", "JERK", "JOBS", "JOVE", "JUNE", "KANE", "KERN", "KISS", "KNOW", "LACK", "LAME",
 "LATE", "LEAK", "LENT", "LICK", "LILA", "LINK", "LOAM", "LONG", "LOST", "LULU", "LYLE", "MAIL", "MANN", "MASH", "MEAD",
 "MEMO", "MILD", "MINI", "MOAN", "MONA", "MORN", "MUDD", "MUTT", "NASH", "NEIL", "NIBS", "NOEL", "NOUN", "ODIN", "OLIN",
 "ONUS", "OUTS", "QUOD", "RAIN", "RAYS", "REEK", "RICE", "RINK", "ROCK", "ROOM", "ROVE", "RULE", "RUST", "SALK", "SAUL",
 "SEAM", "SELF", "SHAW", "SHOW", "SILK", "SITE", "SKIT", "SLIM", "SLUR", "SOAK", "SOME", "SOWN", "STIR", "SUMS", "SWAN",
 "TAKE", "TEAL", "TEND", "THEE", "TICK", "TIME", "TOIL", "TOOT", "TRAM", "TROT", "TUNE", "ULAN", "VAIN", "VEIN", "VINE",
 "WAIL", "WANE", "WAST", "WEAN", "WENT", "WHET", "WINE", "WOLF", "WORN", "YARN" }

UPDATE: Wow, I got a surprisingly big response to this post, making it to the front-page of Hacker News and Reddit, here are some updates:

Android Tips: Generating a coverage report for your unit tests

The Android testing framework has the built-in ability to generate a code coverage report for your unit tests. Unfortunately this functionality is not available within the Eclipse IDE, so you have to resort to some command line and Ant fu.

First off, you need to create a test project for your Android app and some unit tests.

Next, run the following command:

android update test-project -m <path to app project> -p <path to test project>

This will create a Ant build.xml file in your test project’s top-level directory. The android tool can be found in the tools folder of your SDK installation.

Now, from your test projects top-level directory, run the following command:

ant coverage

This will build, instrument, deploy and run your unit tests. It will also generate a HTML coverage report.

The location of the report will be displayed in the last few lines of the Ant script’s output. Point a web browser at the coverage report and weep :)

UPDATE: if you are using SDK 14 or later then the command to run is now:

ant emma debug install test

See the SDK Ant command reference for more details

Android Tips: The emulator

In the last two months I have written two Android apps, in doing so I have uncovered a number of tricks and quirks which I thought I’d share. To start with, the Android emulator…

Keyboard shortcuts

Surprisingly, the GUI for the emulator does not provide controls for a number of functions such as emulating a change in orientation, instead you need to use keyboard short-cuts.

Two particularly useful ones are:

  • 7 on your keypad (or CTRL+F11) which cycles through portrait and landscape layouts.
  • F8 which toggles cell networking on and off

Connecting to the emulator console

To connect to the emulator console you need to telnet to the emulator’s console port on localhost. The console port is displayed in the title bar of the emulator window and is normally 5554.

telnet localhost 5554

You can also use the  adb command (in the tools folder of the SDK install) to list out all the running emulators and their ports:

adb devices

Emulating power state

Through the emulator console you can easily manipulate the power state of the emulator. To see the current state type:

power display

To emulate unplugging the device from a power source, type:

power ac off

Note: for some reason this does not seem to change the charging state of the emulated device.

To “plug” the device back in:

power ac on

To set the battery level to 10% use:

power capacity 10

Note: This is incorrectly documented in the SDK documentation.

There are a bunch of other commands that can be run through the emulator which allow simulation of  network connectivity & latency, telephony, SMS services etc.

Accessing the shell

Using adb you can get access to the shell of the OS running within the emulator. This allows you to execute some of the low level apps installed on the  device. To access the shell type:

adb shell

Since Android is running on a flavour of Linux you can move around the using ls and cd commands. Type the following to see where the native executables are installed:

echo $PATH$

Most of the useful applications can be found in /system/bin. Run this to see what you have access to:

ls /system/bin

Going monkey on your app

Within the shell you can run the Monkey stress tool. This tool emulates random button mashing, phone rotations and screen touches to stress out your app. Unleash monkey with the following command:

monkey -p your.package.name -v 500

Turning Japanese

Sometimes when you run Monkey it will change your IME, often to the Japanese one. To fix this long press on an input field, then select Input Method and then Android Keyboard from the pop-up options.

Setting the emulator’s date & time

Via the shell you can set the emulator’s date & time which is particularly useful for testing time based logic. Unfortunately the date command only accepts the number of seconds since 1970-01-01 00:00:00 UTC as input, which is a little tedious to use. However you can use the following command (which I found on Diego Torres Milano’s blog) to set the date from your command prompt (if you are running a unixy operating system):

adb shell date $(date --date="2008-01-31 17:46:59" +%s)

Note: This spits out an error message saying “settimeofday failed Invalid argument” but seems to work anyway.

Wrap up

Hopefully this has been useful, my next post will cover Preferences and how to use them in your apps. Be sure to check out the Android SDK tools documentation for more info.

MeterRec released

Icon for MeterRecI’ve just released my first purchasable app on the Android market.
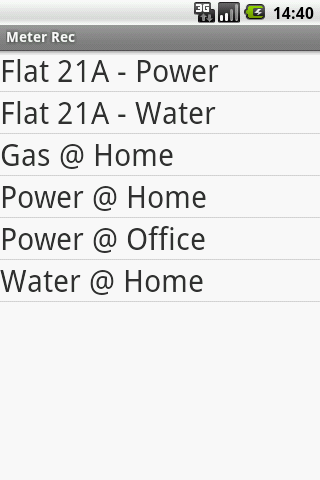
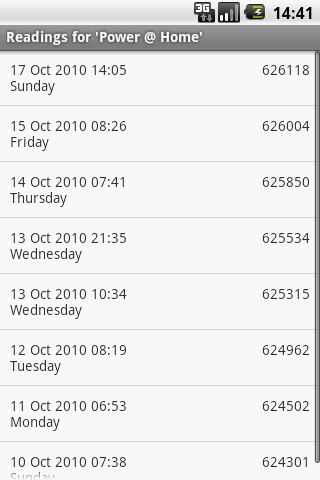
The app is called MeterRec and it allows you to easily record readings for gas, water and power or other similar meters.

These readings can then be exported as a .csv file for manipulation and graphing in applications such as Excel.

This app is ideal for property managers, flat mates or those (like me) who just want to keep tabs on what they are using.

If you have an Android phone then point your barcode scanner at the QR code above, to get a link to the app in the market. For those of you without an Android device, here are a couple of screenshots:

If Star Trek’s computers were real…

Posted by a friend of mine on Facebook… I LMAO:

To be more realistic, Star Trek interactions with the computer should have gone more like this:

“Computer, hail the Klingons.”

“What was that?”

“Hail the Klingons!”

“To help me understand you better, please tell me what you just said…..

1) Ale to Vogons

2) Hail on Vulcan

3) Bale for Klingons”

“None of the above!”

“Initiating death from above.”

“No, stop!”

“Coming to full stop.”

Auckland bus stops in Google Earth

Since Jonah asked for it, I have generated a KML file of the Auckland bus stop data. If you have Google Earth installed then click on this link to see the stops overlaid on an actual map: http://www.rabidgremlin.com/viz/auckland_bus_stops_kml/auckland_bus_stops.kmz

If you hover over a red dot you will get the stop’s number. Interestingly if you zoom in enough, you will see that Google already has all the stops loaded and if you click on a little bus icon under a red dot, you will get the route info for that stop.

Have fun.

Playlist dumper for iTunes

I’ve been meaning to write this bit of software for a while now, its a simple app that dumps out all your playlists in iTunes into .m3u playlist files.

I use it to generate playlists that my HTPC (running Boxee) can play.

It’s a .NET app. You can download it here: PlaylistDumper_v101.zip

If the “dump folder” is the root of your music library then the .m3u file will contain relative paths which is useful for playing across network shares.

Fun with Auckland bus data

A couple of days ago I discovered that Auckland Regional Transport Authority (ARTA) make all of their bus schedule data available for download from the maxx.co.nz site. The data is in the Google Transit Feed format, which means that it consists of a bunch of comma separated value text files, describing things like stops, routes, trips and calendars.

I decided to see what I could do with this data. Below is my first attempt. It is a “density” map of all the bus stops in Auckland.

'Density' map of Auckland bus stops

Click here for a hi-res version that allows you to pan and zoom.

The initial version of the map only took about 30 minutes to create but I have spent a few hours tinkering with it since then.

Quick guide

Here is quick guide to the process if you want to try something like this yourself:

  1. I extracted stops.txt from the data set
  2. I then gpsvisualizer.com to plot out the stops as data points on map. I got it to output a 4096 pixel wide .svg file
  3. Next I used Inkscape to edit the .svg file, adding the text & zoomed area and exporting the result as a  .png file.
  4. Lastly I used the Google Maps Image Cutter to generate the pannable and zoomable version. The Google Maps Image Cutter is a pretty neat tool. It takes any big image, chops it into different resolution tiles and then spits out some html which uses the Google Maps API to view your chopped up image.

Next steps

If I get some more time I will try create some more visualizations. I’m thinking  it would be interesting to merge the bus stop density data with some population data. Also an animation showing 24hrs of bus movement compressed into a couple of minutes would be pretty nice too.

The Amen Break

Came across this fascinating clip about the “Amen Break”, a 5 second sample taken from a 1960 b-side recording by a funk and soul bank. Amazingly this loop became the basis for drum-and-bass and jungle music. Not to mention that it has been used on numerous hip-tracks too.

Watch the video below and check out the Wikipedia page for more info

YouTube Preview Image

BTW if you ever played with MOD trackers in the 90's then check out Sony's free ACID Xpress and relive those glory days :)